
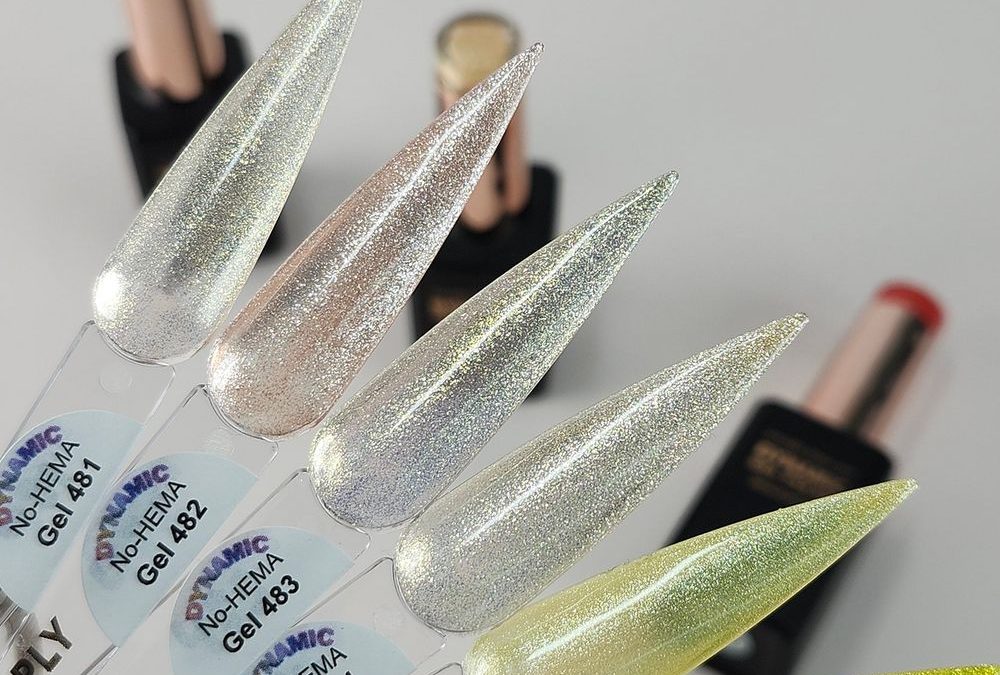
if you remember only one thing: keep the sparkle soft and strategic. Too much holo and you steal the spotlight from the dress; too little and the effect disappears in photos. This pairing guide shows you how to use the icy silvers, pale champagne and soft holographic silver shades from the Dynamic No-HEMA Gel Polish – Color 481 to 490 palette to create refined iridescent silver bridal nails that last.
1. The look and where it works
Think delicate accents, not disco balls. This palette moves from icy silver through pale champagne and soft holographic silver, giving you a luminous, photo‑friendly shimmer. Ideal placements:
- Two accent nails per hand (ring and middle) while the rest stay sheer or soft nude.
- Subtle tip accents—thin, iridescent French smile lines instead of full glitter tips.
- Single bridal accent nail on each hand with a pale champagne base topped with icy silver sheen.
When to choose this: ceremonies, rehearsal dinners, engagement shoots, or brides who want a modern pearlescent note without heavy sparkle.
2. Shades and roles: which color does what
Assign simple roles so the manicure reads cohesive on camera.
- Icy silver (the cool silver options): use as a reflective accent or a light ombré near the cuticle for a soft halo effect.
- Pale champagne: acts as a warm pearly base for accent nails; pairs beautifully with skin tones and photographs as a creamy highlight.
- Soft holographic silver: the subtle microglitter finish—used sparingly—gives an all-over luminosity without texture grit.
All shades share a fine holographic shimmer with slight green/yellow shifts on lighter silvers, so transitions between cool and warm accents look intentional rather than clashing.
3. Prep and station checklist
Prep determines how sheer iridescence reads. Keep it clean, thin and even.
- Tools: 180/240 file, soft buffer, lint-free wipes, isopropyl alcohol, cuticle pusher, thin detailing brush for tips.
- Products: 15ml bottles of your chosen shades, a thin base for sheer nails (or a one-coat builder base if you need length support), and a glossy topcoat designed for gel.
- Quick specs: curing 60–120 seconds per layer under UV/LED; bottle size is 15ml—plan bottles per station accordingly. Price per bottle is $8; prices may change.
- Safety note: this set is HEMA-free, which reduces the likelihood of allergic sensitivity. Avoid contact with skin during application and follow normal gel handling hygiene.
4. Step-by-step: natural nail iridescent accent service
Follow a measured, list-heavy workflow to keep timing predictable for bookings.
- Prep natural nails: remove old polish, lightly buff the surface to remove shine, push back cuticles and clean with alcohol. Thin, even prep keeps sheers from pooling.
- Base layer: apply a very thin base coat on all nails. Cure 60–90 seconds depending on lamp. For brides wanting sheer coverage on most nails, apply a translucent nude or thin builder base and cure.
- Placement: decide accent nails (commonly ring and middle). On those nails, paint a thin layer of pale champagne as the base for depth; cure.
- Glow placement with icy silver: using a thin brush, apply icy silver from the cuticle to cover the lower third of the accent nail for a halo effect, or paint a soft ombré into the champagne base with light feather strokes. Cure.
- Soft holographic veil: apply a single thin layer of the soft holographic silver over the top of the accent nails—or just over the tip area for a glancing-sparkle finish. Cure. This layer unifies the textures and adds microglitter shimmer.
- Cleanup: use a small brush dipped in isopropyl to tidy edges before final cure if needed, then do a final 60–90 second cure for the top layer.
- Topcoat and seal: finish with a glossy gel topcoat, making sure to cap free edges for longwear. Cure fully per topcoat directions, then wipe tacky residue if present.
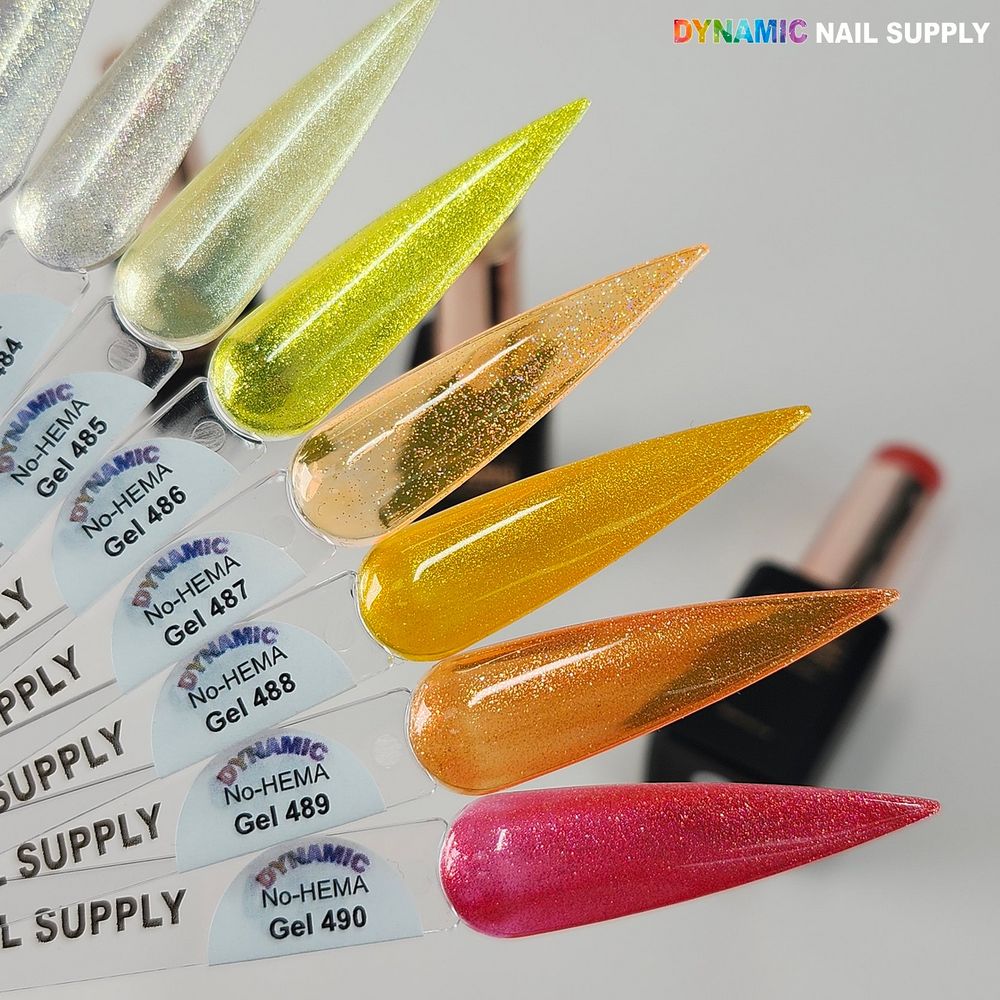
Tip: thin layers are the secret. Because these shades are microglittery, heavy application looks textured and bulky; thin translucent layers preserve luminosity and photo softness.
5. Variations: subtle placement ideas for different brides
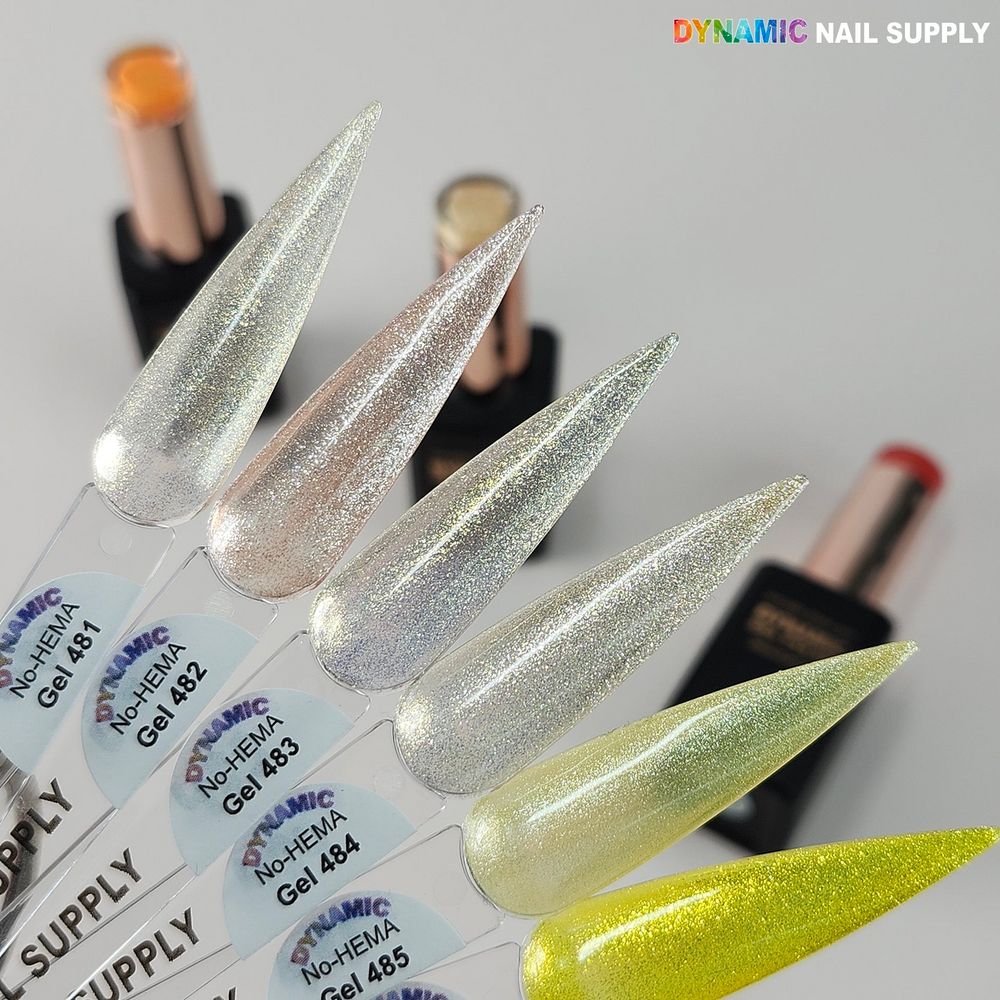
Match the placement to the dress and the bride’s style.
- Minimalist bride: single ring-finger accent with pale champagne base and a narrow icy-silver crescent at the cuticle.
- Glam bride seeking extras: two accent nails with reverse ombré (sparkle at cuticle fading into champagne) and glossy topcoat for mirror shine.
- Boho or outdoor wedding: keep accents matte over the champagne base and add a glossy icy-silver microstipple to catch sunlit moments—seal with gloss on photos day only.
6. Long-wear sealing and finish strategy
Sealing is simple but non-negotiable for a wedding-day manicure.
- Cap the free edge on every coat, not just the topcoat—this prevents premature lifting.
- Let cured layers rest a few seconds before adding the next thin layer to avoid heat spikes, which some clients notice on thick passes.
- Use a high-gloss gel topcoat and cure fully; then wipe the inhibition layer if required. Add a final thin oil to the cuticles after service to hydrate the skin without affecting shine.
- Advise clients to avoid long soaks for the first 24 hours and to use gloves for dishes—simple habits that keep the finish pristine for the honeymoon and photos.
7. Spotlight: No-HEMA Gel 481
No-HEMA Gel 481 sits at the cool end of this set—the icy silver that reads almost pearly in soft light. Use it as your reflective accent: a halo at the cuticle, a delicate smile line, or a light dusting over pale champagne to enliven photos. Its fine holographic shimmer shows a faint greenish shift in certain lighting, which gives accent nails an optical depth without heaviness. Because it’s HEMA-free and pigmented, a little goes a long way—thin layers keep it bridal-appropriate.
8. Quick troubleshooting and pro fixes
Keep these fixes in your back pocket when a plate or camera-ready shot matters.
- Too sparkly in photos: reduce holographic silver top layer to a thin veil or confine to nail tips only.
- Patchy shimmer: apply an ultra-thin second layer before the final topcoat rather than a thick first pass.
- Edge lifting: ensure free-edge capping and thin layers; surface contamination is often the culprit—double-check alcohol cleanse before base coat.
9. Final styling and presentation
Deliver the look with simple staging: photograph hands next to a neutral fabric or bouquet to show how the ice-champagne combo reads on skin. Offer a touch-up kit with a thin topcoat and cuticle oil for the bride to use before photos.
For reference or ordering at your station, see this product option list below:
Order reference: No-HEMA gel polish set
Recap:
- Use pale champagne as the soft base and icy silver for reflective accents.
- Thin layers, cap the free edge, and finish with a glossy topcoat for long wear.
- No-HEMA Gel 481 is ideal for subtle cuticle halos and pearly accents.